Replacing the internal grenade VAZ 2112 - how to do it yourself?
Rear wheel drive vehicles are being replaced by front wheel drive vehicles. In this regard, the crosses are replaced by hinges of equal angular velocities, which are called grenades.
This article is an instruction for replacing an internal grenade on a VAZ 2112 car and other cars from this family. Here you will find a video describing the process, as well as photos of some of the steps in the process.
So, let's begin:
- Causes of failure of the hinge of equal angular velocities
- Determining the need to replace the internal grenade
- Grenade Replacement
- Tool for the job
- Removing the axle shaft (wheel drive)
- Removal and installation of a new CV joint
- Installing the drive on the car
Causes of failure of the hinge of equal angular velocities
What can cause the failure of this element of the car:
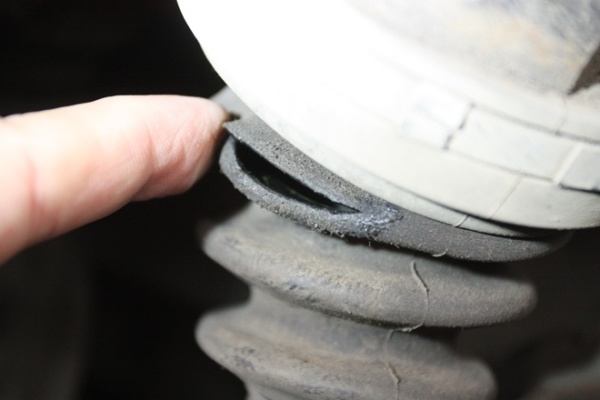
- A poor-quality anther is the first reason and the most important. If the boot on the grenade is made of low-quality material, then it will quickly wear out, and any debris will begin to get inside the grenade.
- Loosening the anther collar also helps to get sand and dust inside the CV joint.
- Other defects in the anther (see), such as shearing the collar, tearing the anther or stretching it, also lead to bad consequences.
- Insufficient lubrication or, even worse, its absence in the CV joint body leads to rapid wear of the bearing and, as a result, wear of the entire part.
Advice! When repairing your car, especially if you have to crawl under the car, do not be lazy and pay attention to the condition of the anthers of the axle shafts. If you notice at least one of the defects listed above, replacing the CV joint with a VAZ 2112 is simply necessary!
Determining the need to replace the internal grenade
Before any repair, it is important to make sure that there is a malfunction.
And now we will do it with the SHRUS:
- Often, you can determine the malfunction by the outgoing sound from the suspected vehicle assembly.
- A hinge malfunction is determined while driving or starting off the vehicle.
- Of course, sounds can come from a faulty one, from a shock absorber strut, and from an engine. Let's learn how to determine what kind of sound should come from the CV joint and when it manifests itself.
- The sound of a malfunctioning grenade is the grinding of metal on metal, similar to a crunch, metal breaking, or a stone hitting a bearing or other undercarriage mechanism.
- When can this sound be heard? If such a sound appears on the turn, this means that you need to change the outer grenade, and not the inner one.
Advice! Although external grenades fail much more often than internal grenades, when repairing external grenades, be sure to check the others for operability. Also add lubricant if necessary.
- On the VAZ 2112, internal CV joints make a sound when driving straight, and especially when the car starts to move.
To more accurately determine the malfunction of the node, diagnostics should be carried out on the viewing hole.
The following describes how to do it yourself:
- The car is driven into a viewing hole. Wheel chocks must be placed under the rear wheels, and the car must be set to the parking brake.
- Next, you should raise the car with a jack so that one of the front wheels rises from the ground.
- Then you should turn the wheel by hand. When the wheel rotates, a sound appears - a malfunction in the internal grenade. If at the same time turn the wheel, then rotate, and only then does a sound appear - a malfunction in.
- After carrying out such an operation, it should be done on the second side (with the opposite wheel).
Now that the damage has been identified, you can begin to repair. Replacing the internal grenade with a VAZ 2112 begins!
Grenade Replacement
Tool for the job
What is needed in order to replace the VAZ 2112 CV joint as quickly and efficiently as possible:
- Sockets and spanners
- Head for 30 (missing in some sets)
- WD-40 or similar
- A hammer
- Collar - the longer the better
- pliers
- Jack
- Screwdriver
- Vise
- Gasoline and brush for cleaning surfaces
- Metal brush
- Nastavka (bronze, copper)
- Metal brush
- Can't do without a partner
- And, of course, a CV joint complete with lubricant (if not, then you should purchase it - the price is acceptable)
Removing the axle shaft (wheel drive)
So, we begin our repair:

- The first step is standard. We drive the car into the pit, put the wheel chocks, the car on the handbrake and neutral, pray (optional) and go!
- When it changes, oil must be drained from the crankcase of the variable gearbox! To do this, unscrew the desired plug, substitute the container for oil, wait for the end of the drain and screw the plug back.
- We remove the cap, if there is one, put a friend behind the wheel and ask him to press the brake hard.
- At this time, we take a head of 30 and a larger collar. Using this tool, unscrew the hub nut, which is located in the middle of the wheel.
- The tightening force of the nut is large, therefore, the longer the knob is, the easier it will be to unscrew it.
- After unscrewing the nut, the car should be raised with a jack. Raise the car, remove the wheel. Be sure to place a stand under the car in the form of, for example, hemp. Do not work on a car that is on a jack!
- We unscrew the wheel bolts and remove the wheel from the car.
- We twist the hub nut completely, remove the metal washer and spray the spline connection of the hub with the outer grenade with WD-40 rust cleaner.
- In order to remove the axle shaft from the car, it is necessary to release the hub. Using the desired key or head, unscrew the two bolts securing the VAZ 2112 ball joint to the hub.
- After that, using a bronze or copper tip, so as not to damage the thread on the outer grenade, we try to dislodge it (the grenade) from engagement with the hub, adding a rust remover to make it easier to come out.
- When the parts are out of engagement, you can move the shock absorber strut to the side and remove the axle shaft (remember, you need to drain the oil, otherwise it will simply leak out onto the floor).
We got the VAZ 2112 half shaft, now we will start replacing the CV joint.
Removal and installation of a new CV joint
So:
- The removed axle shaft must be clamped in a vise for convenience in further work.
- Using a screwdriver and pliers, remove the boot. We unbend the two collars of the anther and tighten it onto the axle shaft.
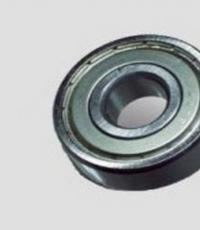
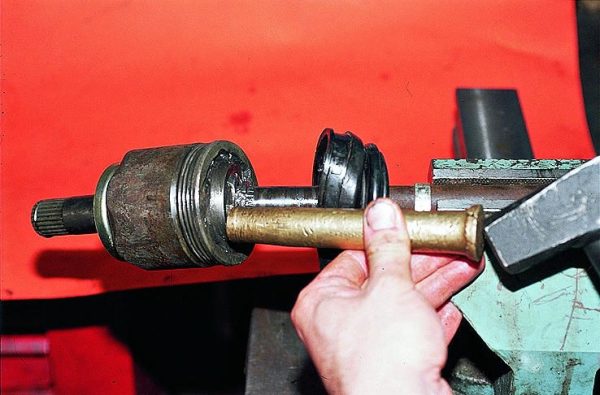
- Now, with the help of a guide and a hammer, you should knock the grenade off the axle shaft. The tip should be placed on the body of the grenade's internal bearing, and not on the body.
- After removing the grenade, you need to remove the old boot and put on a new one, if you plan. It is recommended to change the boot along with the grenade.
- Splined grooves on the axle shaft must be cleaned and preferably washed with gasoline. And then wipe it off.
- The required amount of new grease should be placed in a new grenade. The lubricant used is a special "CV joint", and not lithol or others!
- The grease is stuffed into the CV joint with a finger, rotating the bearing so that the grease is better distributed in the grenade body.
- After that, you can put the grenade on the axle shaft. The grenade is pointed at the spline connection and simply snaps into place with a sharp movement of the hand.
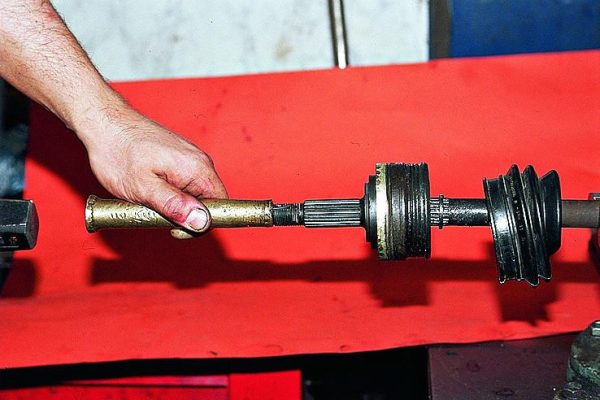
Now the axle shaft with a new CV joint is ready for installation on the VAZ 2112.
Installing the drive on the car
Now we do everything in reverse order:
- We insert the axle shaft into the gearbox housing, we get into the splined engagement in the box.
- We insert the slots into the hub.
- We fasten the two bolts securing the ball joint to the hub, thereby fixing the hub.
- We put on the washer and screw the hub nut onto the outer grenade and tighten it as far as possible.
- We put on the wheel, tighten the wheel bolts and lower the car onto the wheels.
- Now you should stretch the wheel bolts, and also tighten the central nut with a head by 30.
- This will again require the help of a partner pressing the brake pedal.
- Don't forget to add oil to the gearbox.
- After pouring oil into the gearbox housing, check for oil leakage at the junction of the inner CV joint with the gearbox.
If necessary, repair the second axle shaft in the same way, replacing the grenades that have failed.
Keep track of the condition of your car and then it will be a pleasure to drive not only for you, but also for passengers. And most importantly, even your life can depend on the technical condition of any vehicle component! Good luck on the roads!